A quick look at how to clean litter robot:
- Locate and Press the Litter Robot’s Empty Button
- Newer Model Users Need to Remove the Bonnet
- Deal With Any Excess Litter
- Wash the Litter Robot’s Globe
- Let the Globe Dry
- Empty and Wipe Down the Waste Drawer
- Place a New Trash Bag into the Waste Drawer
- Clean the Base’s Exterior
I will show all the details in the post, please read on.
One common method for avoiding the hassle of maintaining a litter box is to use a litter robot. Some households with multiple cats may depend on them to maintain order. However, even a litter robot requires some care. You will require basic cleanings with a litter robot once a month or so. To reduce odor, filters should be changed at least once every few months.
Table of Contents
How to Deep Clean the Litter Robot?
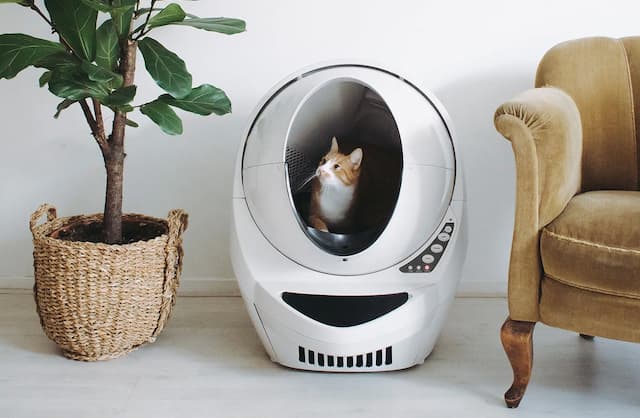
So deep cleaning a litter robot, such as the Litter-Robot 3 Core is more complex than most people realize. There are many moving parts when ensuring this automatic litter box becomes clean.
After all, the Litter-Robot is a self-cleaning litter box “that uses a rotating globe to sift and separate
clumps from the clean cat litter.” It’s a complicated machine.
You shouldn’t worry, though. I’ve got you covered with this 8-step plan that makes everything simple and painless.
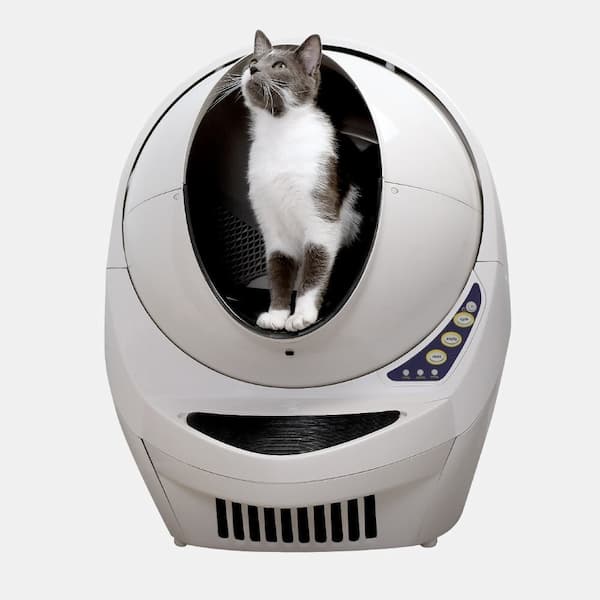
Locate and Press the Litter Robot’s Empty Button
Your first step will be locating and pressing the “empty” button on the litter robot. When pressed, the entire litter will be released from the globe and placed in this device’s trash can.
Additionally, it will enable users to better clean the globe by removing it from the device’s base. For the following steps, this placement greatly improves organization.
Here’s a video to learn about how to locate and work each button on your Robot 3 litter box. Anyone who is a little perplexed by their litter robot will benefit greatly from it.
Newer Model Users Need to Remove the Bonnet
In their more recent models, the manufacturer upgraded the litter robots by adding a bonnet. These parts will be seen to circle the earth.
Before moving on to the next step, if you see a bonnet, it needs to be removed. Users will need to lift and rotate the bonnet after pressing the release buttons on either side of it.
Any cat owner who feels a little intimidated by the bonnet removal procedure ought to find it helpful.
Then take it out of the globe and place it nearby, safely.
Deal With Any Excess Litter
It’s possible that this automatic litter box contains extra waste. If it does, use a brush or other object to remove it; otherwise, future cleaning may be challenging.
After all, every cat owner is aware of the cleaning nightmare that is wet litter. It will eventually form a messy clay clump that is difficult to remove.
Wash the Litter Robot’s Globe
Lack of electrical components is a major advantage of the litter robot’s globe. As a result, cleaning is made simpler because you can wet the globe.
To effectively clean the globe, I’d advise using mild soap and a damp cloth. If you believe it is necessary, putting the globe under running water with soap will also work.
Don’t, however, immerse the base in water. The electronic components in the base piece of this automatic litter box do not mix at all with water.
It will only result in their destruction or render them useless.
Let the Globe Dry
Don’t send the globe back to the base too quickly, given its electronic components. To prevent submerging the base in water, you’ll need to completely dry the globe.
So be sure to dry off the globe with a paper towel to remove any extra moisture. Let it air dry for a while after that before going back to the base.
Empty and Wipe Down the Waste Drawer
Each litter robot will be equipped with a waste drawer. It will be the observable large drawer that is situated at the bottom of the base.
You should take out the trash bag from the drawer by opening it. It’s then just a simple matter of throwing it away. In this expertly made YouTube video, the entire process is thoroughly explained.
The waste drawer needs to be cleaned up next. But be sure to keep it completely separate from the automatic litter box’s main part.
Once you’ve separated it, clean the drawer with soap and water. After that, dry it off with a different, spotless towel or rag.
Place a New Trash Bag into the Waste Drawer
It’s okay to put a trash bag back into the waste drawer because it’s now clean. Open a 10-gallon trash bag of your preferred brand and wrap it around the waste drawer’s sides.
On the waste drawer, there are four or five liftable rubber pieces that you’ll notice. To fit your trash bag into the waste drawer of the litter robot, slide it underneath them.
If there are any problems, watch this great video that will guide you through the steps.
It’s also important to know that the bag doesn’t have to be a 10-gallon size. Although 8-gallon or 13-gallon options will fit, litter robots were made specifically for them.
Clean the Base’s Exterior
The base’s exterior should be cleaned with a wet rag as your final step. Use this rag and soap to thoroughly clean it, making sure not to miss any areas.
But bear in mind not to clean the inside of this base part. Nobody wants their internal electronic components to be damaged, which is what will happen.
Now that the litter robot has been thoroughly cleaned, your cat should have no trouble using the restroom. In our next section, we’ll explore how frequently this process needs to be completed.
How to Maintain Your Litter Robot?
every month to three months, carry out a fundamental cleaning. The number of cats you have and your ability to control the smell of a dirty box will determine how often you should perform a basic cleaning. Empty the waste drawer if there are any indications that it is overflowing. Otherwise, make sure to clean once a month or so.
If the litter box smells, swap out the carbon filter. The waste drawer’s side that faces out from the base should have a long, flexible filter that fits against it. Odors are kept from escaping thanks to this. Make a call to the maker or order a replacement litter box from their website if the litter box starts to smell.
- Each filter ought to last a few months, but how frequently you change it will partly depend on your own preferences.
- In order for the litter robot to function, neither the carbon filter nor the brush seal are necessary. But the smell will get worse.
If the litter box smells, replace the brush seal. A seal that resembles a brush also surrounds the inside of the base where it joins the globe. Call the manufacturer to place an order for a new brush seal when the box starts to smell.
Frequently Asked Questions
How Often Do I Have to Clean My Litter-Robot?
If you only have one cat, you can deep clean the Little-Robot every few months, wipe it down once a month, and empty your waste drawer once a week.
However, if you have more kittens, we advise cleaning more frequently and removing the waste a few times each week.
How Do I Keep My Litter-Robot from Smelling?
Cleaning the machine and emptying the waste drawer on a regular basis will keep your Litter-Robot odor-free. To keep the interiors smelling fresh all year long, you should also spend money on replacement carbon filters.
Now, a different cause could exist if the odors are very offensive. Ask your veterinarian if your cat requires any additional pet care products for health and hygiene reasons.
Conclusion
Isn’t caring for a cat easier than caring for dogs when you have a Litter-Robot to take care of the need to scoop cat waste?
We sincerely hope that our advice helped you get the most use possible out of this clever little device. Keep in mind that if you take good care of it, it will last you (and your cat) for a very, very long time.
Read about